


In the latest of our quick tutorials series we want to discuss using anchor tags specifically with the Divi builder.
To quickly summarize what anchor tags are and how they can be used, think of them as bookmarks on a page. On one of the most common uses is for one page websites where a user may click the ‘about’ section for example and rather than the link taking them to an about page it scrolls the user to that section.
These types of sites can be extremely useful when you want to convey information quickly or there isn’t loads of it e.g. a landing page.
To implement anchor tags with Divi is a fairly simple process:
Step 1:
Head over to each section of your site within the Divi builder, then visit ‘Section Module Settings’. From here you’ll want to click advanced then set an ID for the section. For example if you’re creating a contact section you’ll want to add say homepage-contact by making this identifier a little more unique it can make it easier to work with.
To learn more about adding CSS to the Divi theme take a look at our article here

Step 2:
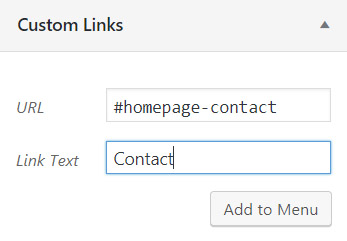
Visit the appearance then menus within your site. From here create a custom link, for the link text you’ll want to add something that represents what it is e.g. ‘Contact’’ then for the actual link put your ID with a hashtag in-front of it. For example: #homepage-contact.
Step 3:
Save your menu and then visit your site to check that your anchor tag scrolls to where you want it within the page.
Using Anchor Tags Within Text:
You don’t just have to use anchor tags within your menu, they can also be used within text such as when writing a paragraph you may want to put ‘contact’ within the text so that when clicked it scrolls the user to that section.
To do this simply set the href link for your text to the ID e.g. <a href=”#homepage-contact”>Contact</a> or within Divi if you’re editing the text use the link settings to set your link as ‘#homepage-contact’.

We’d appreciate a share or any comments if you found this useful, thanks!